Day 23…. I mentioned yesterday that I really like contrasting textures, and I do. For some reason, contrasts really appeal to me, whether it is textures, colors, metals,….. even in nature I am attracted to things that have a strong contrasting edge. I showed you yesterday how I use my Electric Vibratory Engraver. It works wonderful at giving a matte or satin finish, and is quick. A good contrasting finish is sometimes better than a good shiny polish.
Today I will add a twist to the Electric Vibratory Engraver by adding a diamond bit. On Day 13 of this journey, I showed you how to bezel set or tube set a stone and now we will do something similar, just with a twist, we will be setting it upside down. What WHAT??? Yes, upside down.
I use a piece of brass rod (2.35 mm), I file it flat and drill a pilot hole in the end with a bit about 1.4mm. In this instance I am using a stone that is 1.75mm. You can use different sized stones if you like, this is just one I had that was chipped on the girdle. (a good use for chipped stones) Any size diamond will work as long as the “culet” or bottom point of the stone is in good shape.


Use a 1.70mm Hart Bur to cut the seat for the stone, and use a Cylinder Bur
(1.40mm or so) to clean the bezel walls and flatten the bottom of the seat so it makes good flat contact with the stone after it is set upside down. Place the stone in the setting, top side down and make sure that the top of the bezel is just barely over the girdle. You want the stone to be exposed as much as possible, if the bezel is too tall, just file it down a bit. Set the stone by pressing the bezel over with a Flat, Square Prong Pusher
.


Now that the stone is set into the brass rod, trim the brass to approximately one inch total length, (trim to how ever you feel comfortable 3/4″ to 1″) use a small flat screw driver to remove the screw that holds the bit that is in the engraver and insert the piece you just made. The new tool is smaller in diameter than the hole it fits into, but once the screw is tightened, it holds firmly.
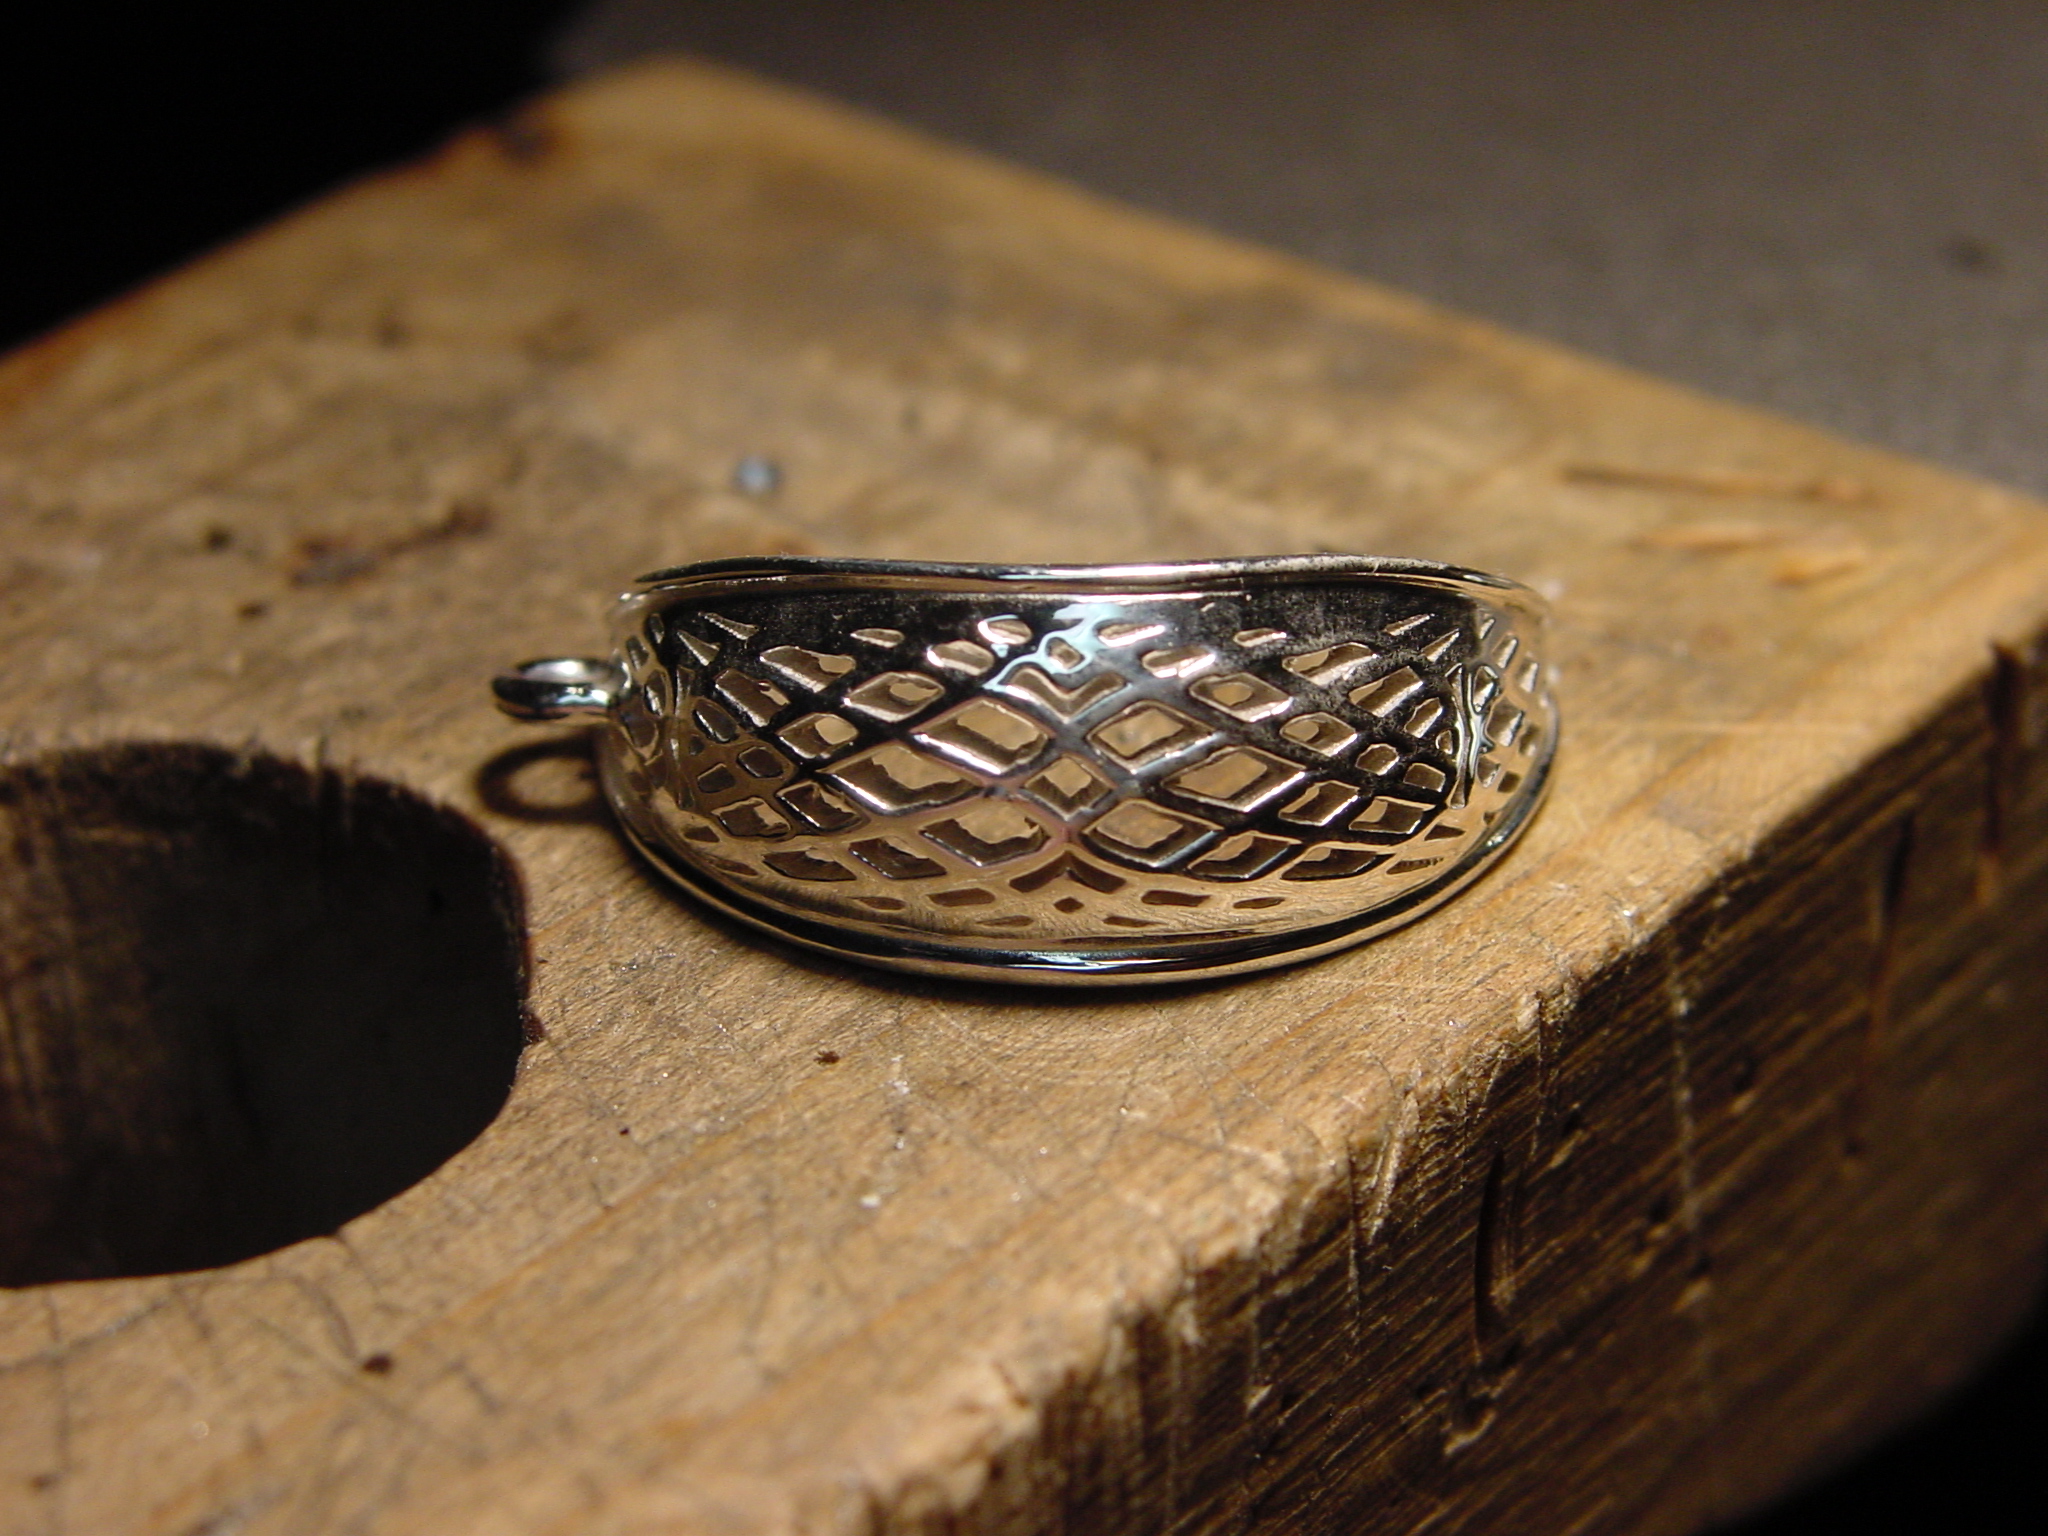
Now just turn on the engraver and rub over the area that you want textured. I try to keep the back and forth motion going in the same direction to make the look of the texture uniform. Be careful though since the movement of the engraver is an up and down motion, (like a small jackhammer) and if you touch an area that you do not want textured, it will leave small little divots or pits. The texture from the diamond bit tool is much shinier and brighter than the steel tool. It will reflect the light like a diamond wheeled surface and catch the light and look like itty bitty diamonds are set in the surface of the metal. The images I took do not do justice to the actual look of the piece.


Thanks for stopping by. I hope to see some of your contrasting textures.
Until Tomorrow……
Doug
Thank you so much Doug. I learn from you every day. Keep up the wonderful class.
Thanks Michelle, that makes my heart warm, and keeps me going.
Thank you so much Doug. I learn from you every day. Keep up the wonderful class.
Thanks Michelle, that makes my heart warm, and keeps me going.
Hi Doug, I think your amazing for doing the 90 day jewelry blog. I have only caught the last several posts, but I have already learned some good things and I enjoy reading them.
One question, I have a hammer drill (that I’ve never used) could I use this instead of the electric vibratory engraver? Or could you cover hammer drills in a future blog?
Cheers! Carol
>
Thanks. You could use a hammer drill, in fact they make a diamond bit for them, but turn the intensity way down. I will cover the hammer drill in a channel setting demo later.
Doug
This is such an interesting blog! Thank you for creating it!
Can you use a CZ instead of a diamond?
Patricia, thank you. You can use a cz, but it probably won’t last as long, especially on gold, but for silver it should hold up ok.
Thanks again
Doug
This is such an interesting blog! Thank you for creating it!
Can you use a CZ instead of a diamond?
Patricia, thank you. You can use a cz, but it probably won’t last as long, especially on gold, but for silver it should hold up ok.
Thanks again
Doug
Comments are closed.