Welcome back to day 3. I had a couple of questions/comments about the graver that I used to shape the earring I made yesterday, so let’s jump into tools and tool maintenance, namely… the graver.
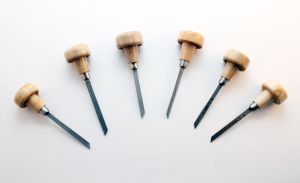
There are many shapes and sizes of gravers available, but if you want to get into hand crafting of metal, get familiar with a few gravers. I will just touch on one today, but at a later date, we will get into a few more styles.
When it comes to metal clean up, getting into those tough to get areas, or just getting a flat clean edge on a piece of silver or gold, my go-to graver is a flat graver. Get yourself a few of these in different widths and see what you can do, it will become a tool that you will grow to love, but when it comes to shaping a graver, there are a few very important things you must do first.
When you buy a new graver, it will have to be shaped and sharpened. This shaping process is VERY important and you must be VERY PATIENT! I cannot express this enough. The hardness of a graver end is heat treated and it is very easy to change it, do to overheating by grinding.
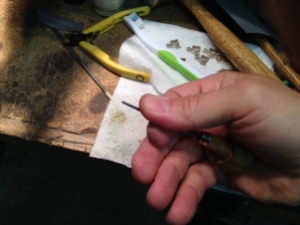
First, get a graver handle. These come in different lengths as well. Find the shortest handle first and mount the pointed end of the graver into it. Your graver will last years and years, and if it gets shorter, then replace the handle with a longer handle to lengthen the blade. I find it easier if you drill a hole into the wood first, (approx 1/8″ drill bit). There are a few shapes of handles as well, I like the ones that are mushroom shaped with a flat spot cut into it. It fits better in my hand. After you have drilled the hole into the handle, about 1″ deep or so, pound the graver blade into the handle. I find it easiest to place the graver on a piece of wood, like a small 2×4 or something like that, then I pound the handle onto the graver, making sure the bottom edge of the graver is lined up with the flat edge of the handle. After the graver is seated firmly into the handle, place the graver in the palm of your hand so that it sits comfortably. Hold it comfortably so that the graver handle rests in the palm and the graver blade is held in the thumb and forefinger. make a mark on the blade about 1/2 inch past your thumb.
This is where you will cut off the blade. (they come longer than needed). I use a cutoff wheel to trim the excess off. After it is cut off, the shaping begins. Again, I cannot express how important it is to take your time doing this. Have a cup of water handy and grind the graver for about 1 second, then dip it in the water, grind for 1 second, then dip in the water……repeat, repeat, repeat. You do not want this graver to get hot or it will not work properly, it will chip and break easily or get dull quick.
Grind the blade into the shape of the graver shown, you want the cutting end to come to a thin end, approx 2mm or so, like the graver here:
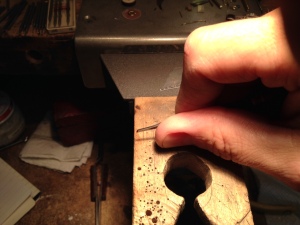
Now it is time to sharpen the graver with a sharpening block or a wet stone, there are a number of jigs you can use to set the angle of the graver edge, I try to keep mine at about a 45-50 degree angle:
Some people like to grind the opposite edge at about a 5-10 degree angle (called a heel) which helps the metal to be removed easier, I just keep mine flat.
Another trick I like to do is to polish the bottom side of my gravers, which leaves a “mirror” finish. I do this by first removing all the scratches on the bottom side of the blade with 600-1000 grit sandpaper, then taking hard yellow polishing compound and rubbing it on a piece of paper, coating the paper with the compound, then rubbing the bottom side of the graver on the paper, polishing it until it is shiny and scratch free. This will make your graver cut silver like butter and give you a super-shiny surface.
I hope this was not too confusing…… if it was, feel free to comment and ask questions, I will try to clarify if need be.
Now go have fun!
Doug


I love that you polish the underside of the graver, such a great idea and helpful tip!
Thanks Stephanie, it really makes a huge difference, and you can cut designs on the edge of a piece and it looks like you took a diamond wheel to it, shines like crazy!
I am going to order a few gravers. What three widths would you recommend to start with?
Depends on the type of work you are going to do, but for a starter, I would suggest:
#2 Onglette
#42 Flat
#52 Round
#3 Knife
This should get you started and used to how they work, after you get used to them, you can cater to the type of work you are doing and get more.
OMG, you are going over things I had questions about for years, thank you! Keep this up, please!
Thanks, I will.
Pingback: Day 27 Pendant Clean-up and Stone Setting | JewelryMonk
Comments are closed.