Well, I dug up another project to spend some time on. It is a raw sterling silver casting and over the next few days I will go over how I clean it up, do some prep work to it, go over some polishing with compound types, brushes and wheels, and do some channel and bezel setting. With all that said, lets dive in.

First I have my raw casting. With a raw casting, the surface is usually a little rough. Even if the wax is cleaned up very well, the “skin” on the casting has the surface texture of the investment used. Although it is “smooth”, it is “gritty” and the color is white.

This casting had 2 sprues/gates attached to the bottom. They have been clipped and there is a little excess left. For clipping off the casting tree, you want a good set of Strong Cutters. You don’t want to clip the piece too close because it will mar the piece and possibly distort it from the cutting tool. I file the excess off with 2 files, the first is a #4 Barrette Needle File
and I use it on the “convex” shape of the design. I also use a #4 Crossing Needle File
for the other side since it has a “concave” surface.


I gently file the surface with both files to remove the casting “skin” or the white surface. on this piece, the inside edge next to the marquise setting is a little rough. I have a Surgical Blade that I have modified the tip to get into tight areas like this. I mount it on my Scalpel Handle
and “shave the inside edge until it is smooth. This blade can also be polished on a piece of paper with Yellow Rouge on it like the examples in the blog entries of Day 3 and Day 8.


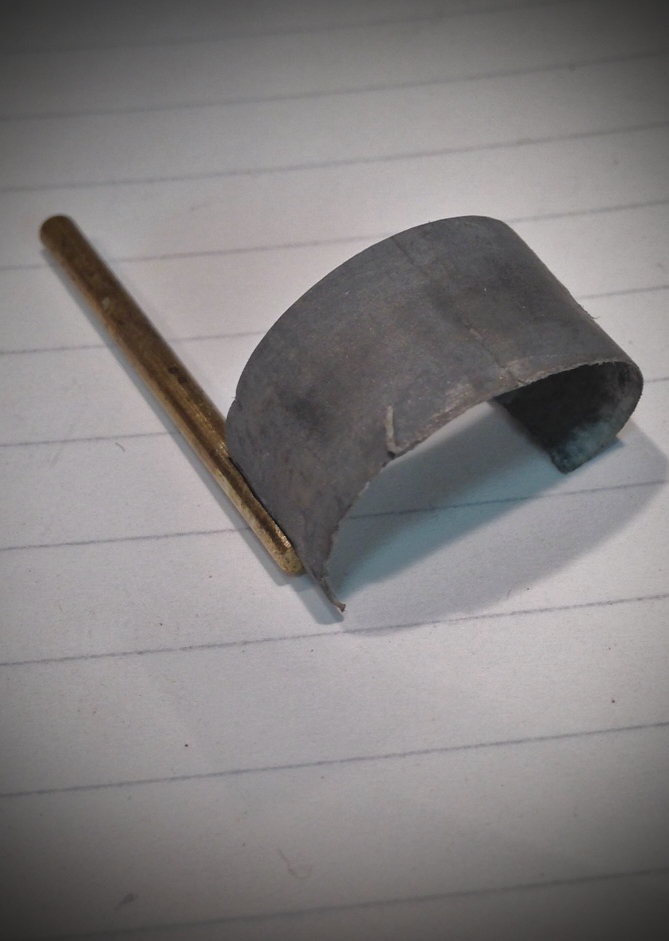
I have also made miniature “Split Mandrels“, out of a piece of brass rod, sanded down to 3/32′ (2.35mm), the same thickness as most burs. I carefully cut a slit down the middle to hold the sandpaper about 10mm long. I can load this with a variety of sandpaper grits, but I usually use 320, 400, and 600. I have many of these laying around in different shapes and sizes.

I also go over areas with a Fine Aluminum Oxide Snap On Disc. I have many different sizes of these as well. I cut and sand these so that when they are rotating in your Foredom
, they do not vibrate. This allows you to run the edge of the sandpaper along an edge of the jewelry without marking it.


Go over the whole piece and get any scratches or defects cleaned up.

Now I place the piece in a Magnetic Pin Tumbler to polish and burnish all the areas that are hard to get to. I set it for approx 30 minutes.

That is it for today, tomorrow we will pull it out of the tumbler and go after it with rubber wheels, brushes, and different polishing compounds.
Enjoy your day, now go make something wonderful!
Doug