Today we will touch on a couple of pre-polishing tips. A few technical details in your pre-polishing will make a huge difference in the quality of your finished jewelry. Polishing “Prep” will make your finishing job easier always. spending a few extra minutes with attention to detail will save time later, and give you a much better product. Depending on what your piece is like to begin with will decide how you approach this. If you do not take time to prep your pieces before polishing, you will polish harder and more aggressive than you need to, and lose most or all of your detail, making your pieces look overworked and washed away.
First, tumbling, if you are working with a casted piece, you will have a casting surface that is a little rough. If you have a Vibratory Tumbler, I would recommend a 2 stage tumbling process, the first stage I usually tumble in a Ceramic Media
overnight for 8 – 12 hours. I have my tumbler hooked up to a timer, set it up overnight and get it in the morning. This will remove the casting surface and give you a consistent surface. Then I place the pieces in the same vibratory tumbler with STAINLESS STEEL MEDIA MIXED SHOT
for 1-2 hours.


What the Steel does is “burnish” the surface and give you a shiny finish in those hard to get to places. A Magnetic Pin Tumbler also works great for this operation, and will do the job much quicker. Magnetic tumbler media is a lot “finer” and will get into those hard to reach places, like between prongs and fine detail, much better. If you are not dealing with casted products and the surface is a little better to begin with, you can go right to the steel shot or magnetic pin tumbler.


If you do not have a tumbler, then work in “stages”. If your piece has scratches in it, you will have to remove the scratches before you start polishing. depending on the size and depth of the scratches will determine how aggressive you will work the piece. if you have deeper scratches, start with a file. As I mentioned in an earlier post, my favorite go-to file is a #4 cut Barrette Needle File, it has a good cut to it, it has “safe sides” meaning you can place the edge or side of the file against en edge of the piece, and it won’t leave a mark. If you get one of these files, I suggest you modify the sides of your file. The teeth of the file do hang over the side a little bit, so I rub it on a wetstone to remove the burs or teeth that hang over, then polish it on a piece of paper with Yellow Rouge
on it, the same way I polish my graver blades. (see day 3 lesson)


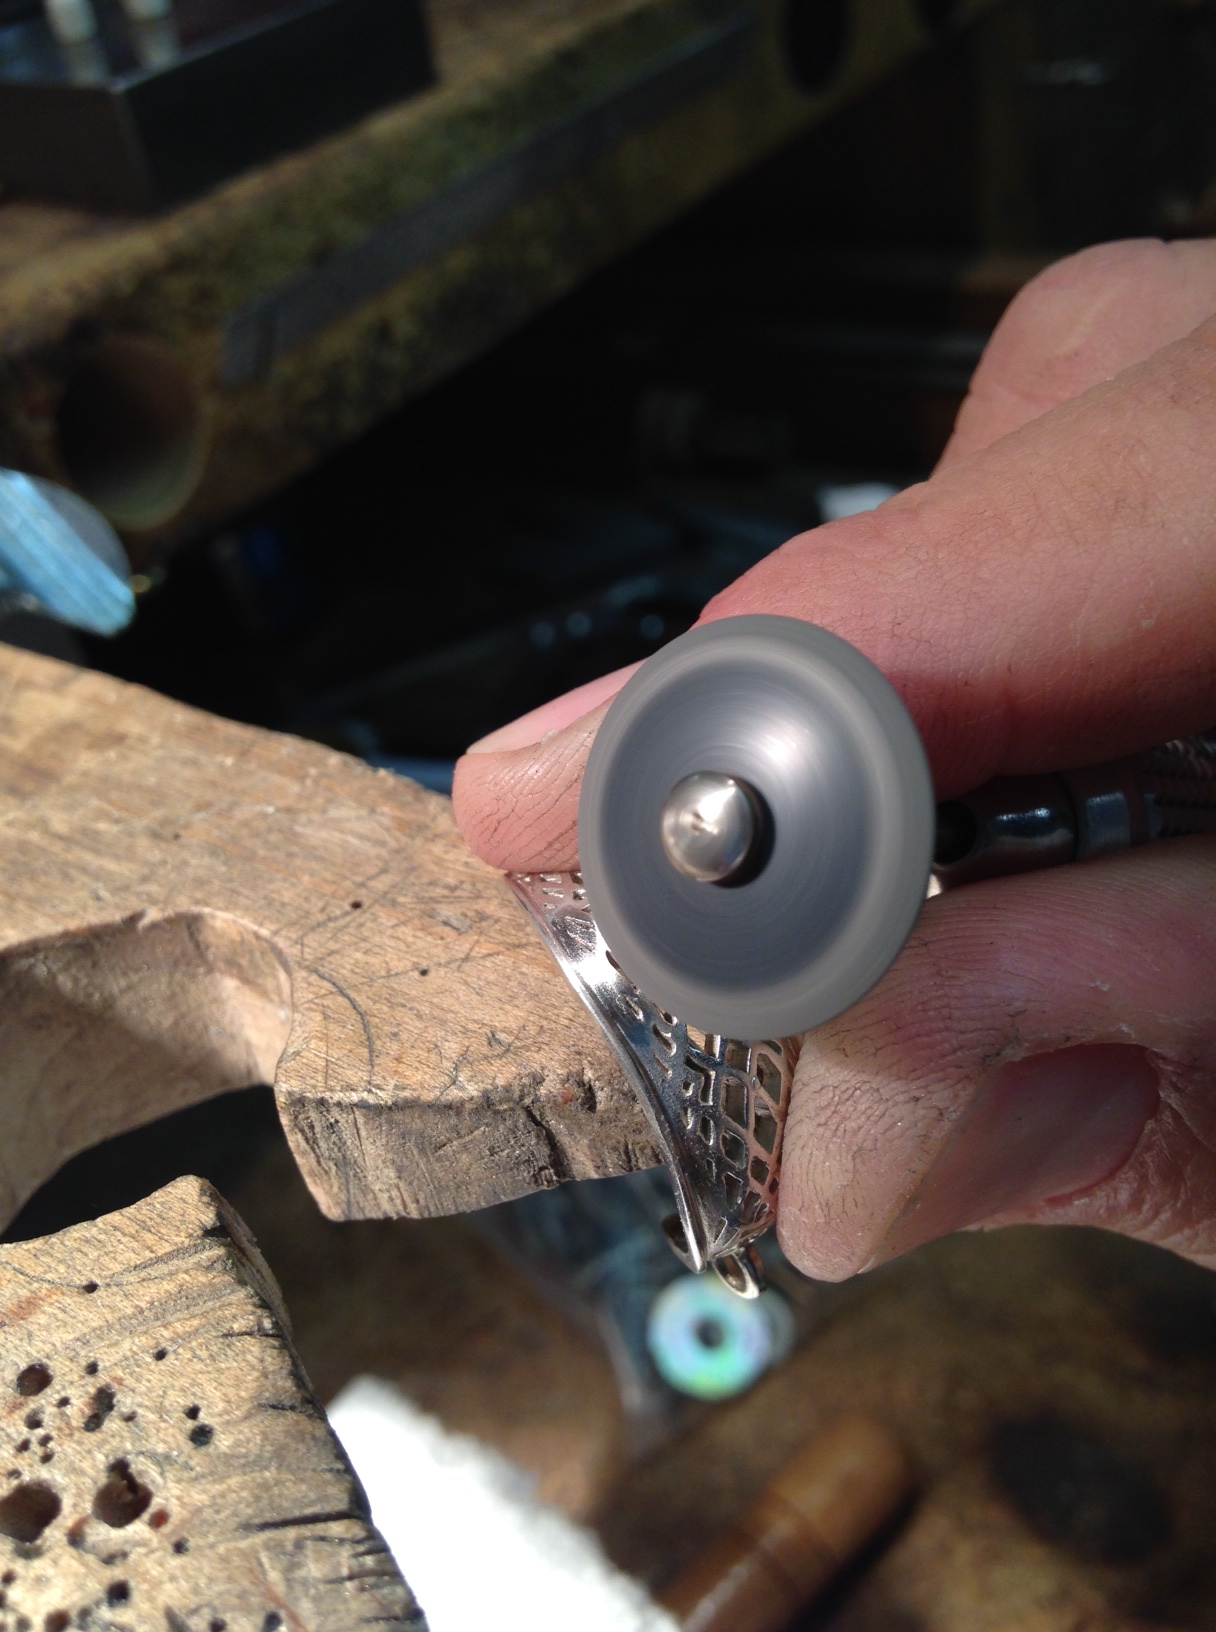
After I file the scratches or defects out, I cut a small piece of sandpaper (400-600 grit) and wrap it around the end of the same file and sand over the area I filed. You can also attack the areas with Sanding Abrasive Discs. These discs come in different grit and work wonderful. They snap on and off quickly. I would suggest a variety of these as well. The aluminum oxide ones do a great job as well. Also rubber wheels and knife edge Cratex Wheels
. You can also get these in different grits.

One thing I am trying to show you is there are different ways to go about getting the same results. you will develop your favorite processes, I am giving you some ideas to go about it, but if you skip the preping process, you work might suffer. Use some or all of these processes to prep your pieces before polishing and you will have a much better polishing experience, and a better looking piece in the end. I will go over some polishing tips soon, so stay tuned.
Now have a Great Day!
Doug
Pingback: Day 27 Pendant Clean-up and Stone Setting | JewelryMonk
Comments are closed.